Putting the terminal into operation #
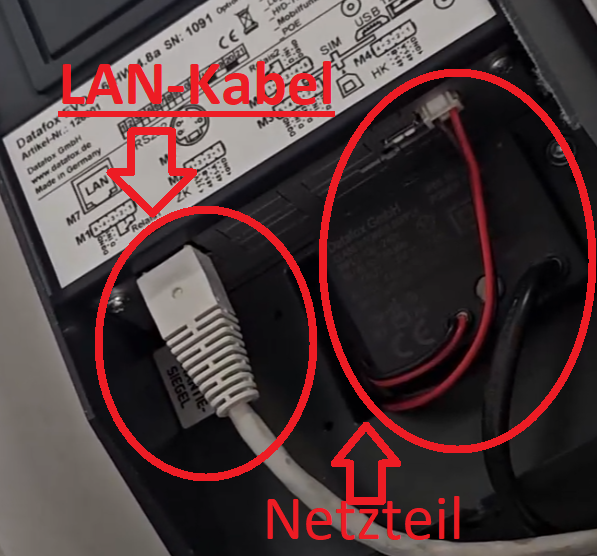
Datafox terminals with cable #
- Plug the network cable (LAN cable) into the device
- Connect an additional power supply unit if necessary
- Screw the bracket to the wall and tighten the locking screw at the bottom.
- Insert plug
- Terminal starts automatically and is ready for operation
- No further setup necessary
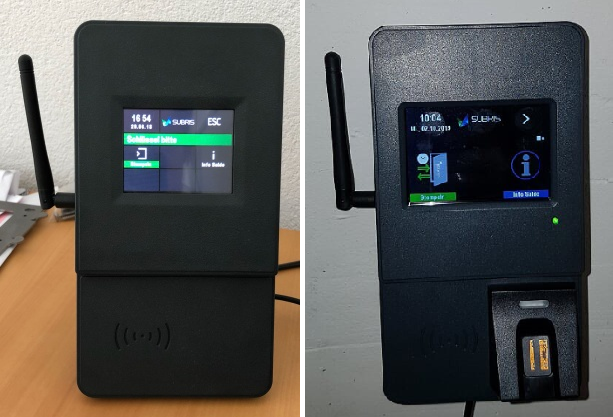
Datafox terminals with WLAN #
- First screw the WLAN antenna to the left side of the device
- Screw the bracket to the wall.
- Attach the terminal and plug in the connector, tighten the locking screw at the bottom (devices with WLAN always have a power supply unit)
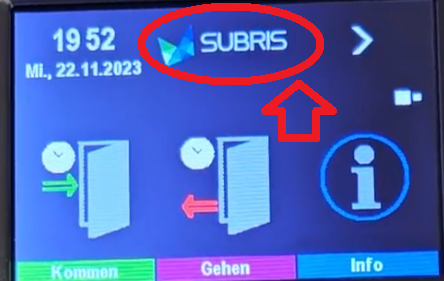
- When the device starts, press and hold the logo until the blue menu appears.
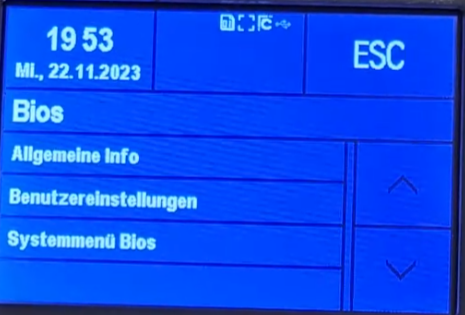
- Click in the device: System menu Bios
- Enter password, confirm with Enter
- Communication
- Interrupt communication
- Change interface from USB to WIFI
- Use the arrow to go to the lowest menu item “Settings”
- Change network
- Select WIFI
- Enter password, confirm with Enter
- Save configuration
- Select and replace memory location
- Use “ESC” at the top right to return to the start page and simply click on “INFO” → “Check balance” to test.
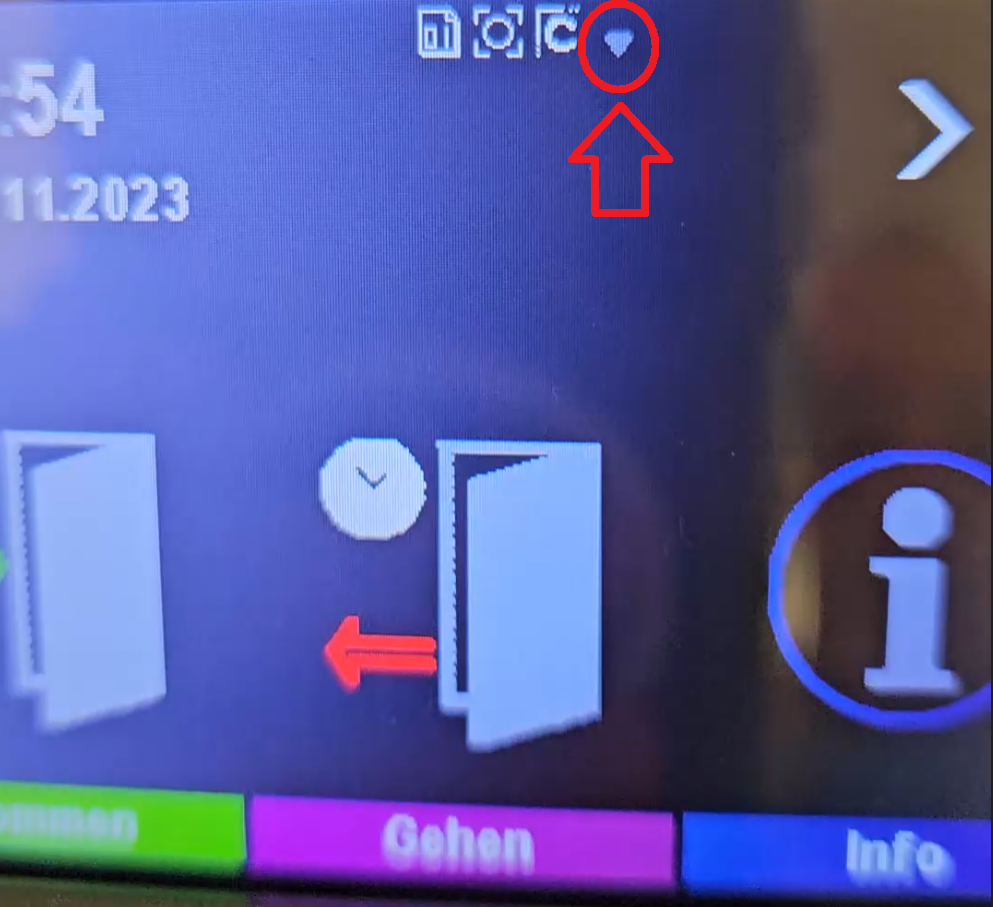
- To see whether the device is connected, briefly press the logo once. An icon will then appear there.
Registering the terminal in the system #
- Log in to your personal ems system.
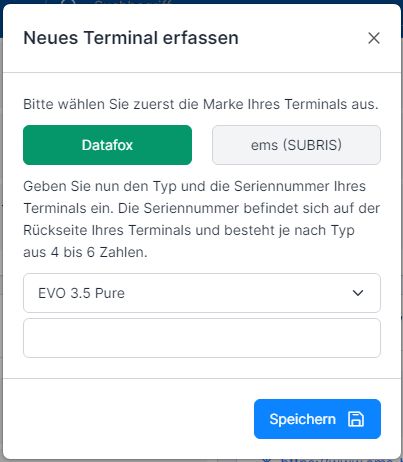
- Go to the system settings and click on the “Plus” symbol.

- After selecting the terminal type, you will be asked to enter the code shown on the display.
Teach in fingerprint #
Step 1 – On the device (Datafox EVO 3.5 Pure) #
- Enter password (customer-specific) and confirm with Enter
- Enter the personnel number and confirm again with Enter
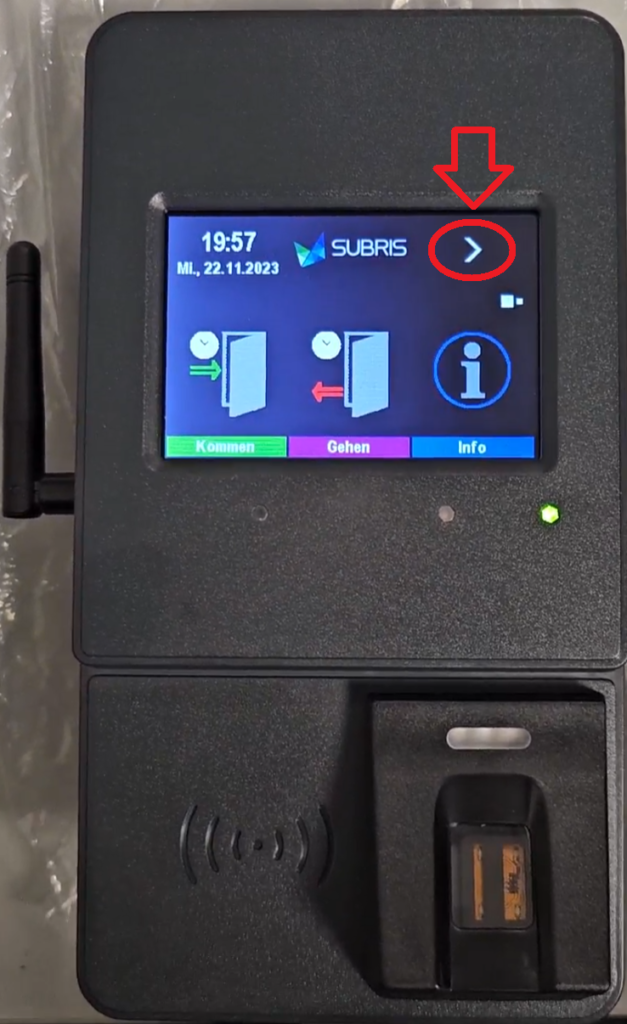
- Once in the next menu, use the arrow > at the top right again to teach in the finger.
- Once there, you or the employee select the finger and confirm the rest of the process by pressing Enter in the middle.
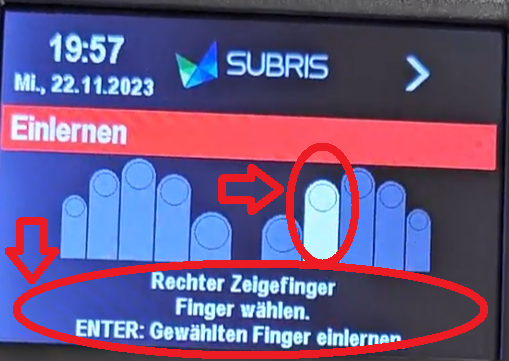
- The green light on the finger scanner is now illuminated
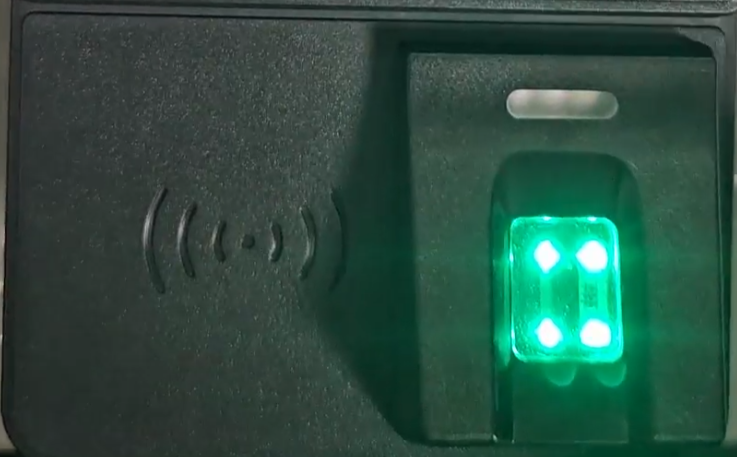
- Now scan the finger 3 times.
-Repeat the process if the quality is poor.
-If the quality is good, continue the process using the arrow > at the top right. Until ENTER: Exit mode appears.
The finger must be scanned on every device where it is to be used.
Important! Fingers must be added to the EMS system, otherwise it will not work.
Step 2 – In the EMS system #
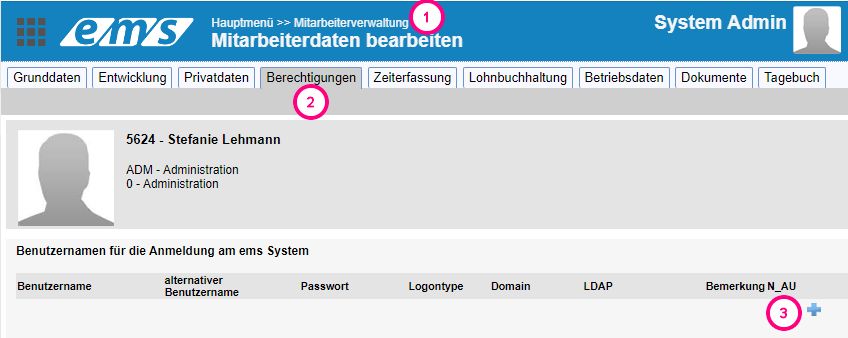
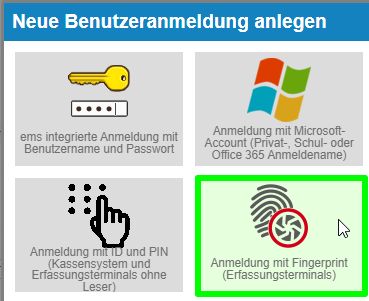
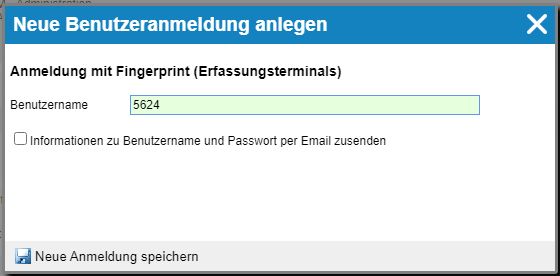
In the EMS system under Employee administration (1) → Edit employee → Authorizations tab (2) → User name for logging in to the ems system → Click on Plus → Log in with fingerprint (registration terminals) → Enter ems personnel number.
Assign transponder #
- Check whether the transponder has a number on the back.
- If not, hold the transponder to the device and take the transponder code from the error message.
- In the ems system under Employee administration (1) → Edit employee → Authorizations tab (2) → User name for login → Click on Plus (3) → Login with transponder card → Enter transponder number

Store authentications in the ems system #
You can read here how authentications (fingerprints, transponders, PINs, logins) are stored and managed in the ems system: Storing authentications in the ems system
Operating the Datafox terminal #
The following operation refers to the standard configuration of SUBRIS. Customer-specific adaptations may lead to a change in operation.
The following operation refers to the standard configuration of SUBRIS. Customer-specific adaptations may lead to a change in operation.
Detailed instructions for the operation and setup of the terminals by the administrators can be found here: Datafox Terminals
Functions #
Coming, going and break #
- Select the relevant function (“Come”, “Go” or “Pause”) on the display or using the buttons
- Identify yourself using your batch or other means of identification (e.g. fingerprint)
- Wait for confirmation from the terminal.
Stamping (only on older terminal models) #
- Select the “Stamp” function on the display or using the buttons
- Identify yourself using your batch or other means of identification (e.g. fingerprint)
- Wait for confirmation from the terminal. The terminal decides independently whether it is “coming” or “going” based on the last saved booking.
Balance #
- Select the “Balance” function on the display or using the buttons
- Identify yourself using your batch or other means of identification (e.g. fingerprint)
- The display shows the current balances from the previous day.
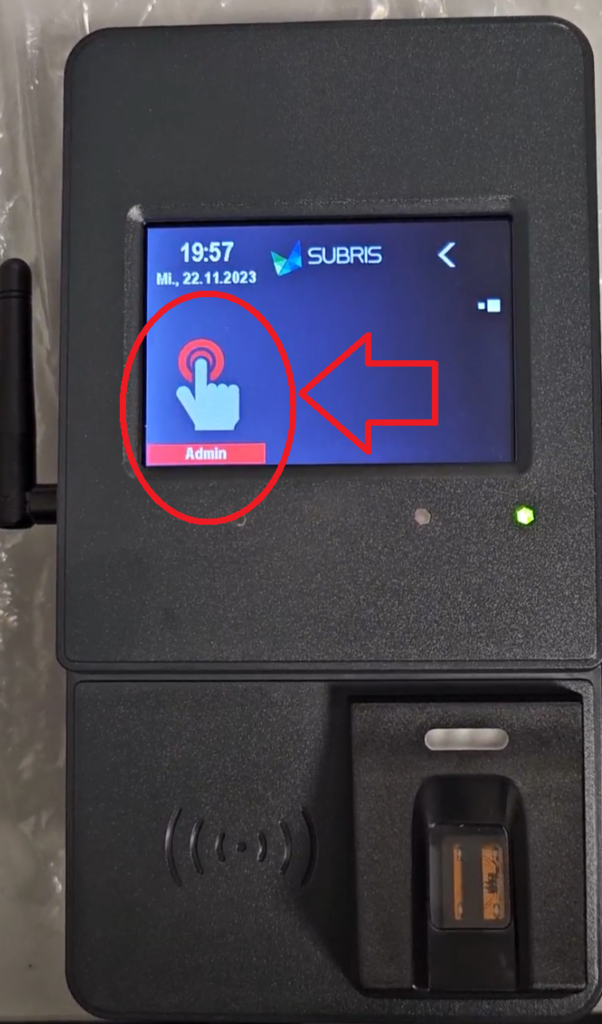
Other functions (2nd page) – Admin (FingerPrint) #
The “Admin” function is intended for teaching fingerprints into the terminal. If you start this function, you have the option of teaching in or deleting new fingers. All biometric data is only stored on the terminal.