In order for the person to be able to record their time and compensation, they must be given access to the system.
You can find out how the authentications are stored on the terminal here: Datafox terminals and ems terminals (TT5, MT7)
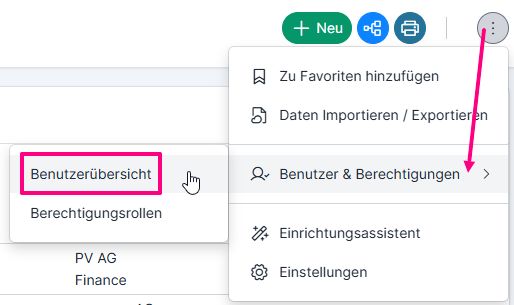
All created and entered user logins are displayed in the user overview (Employee list / Customer addresses / Supplier addresses → Three-dot menu top right → Users & authorizations → User overview.
Read more about it here: User overview
The allocation and creation of access data in the ems system takes place via the employee profiles: Employee administration → Employee list → Person → Authorizations tab → User names
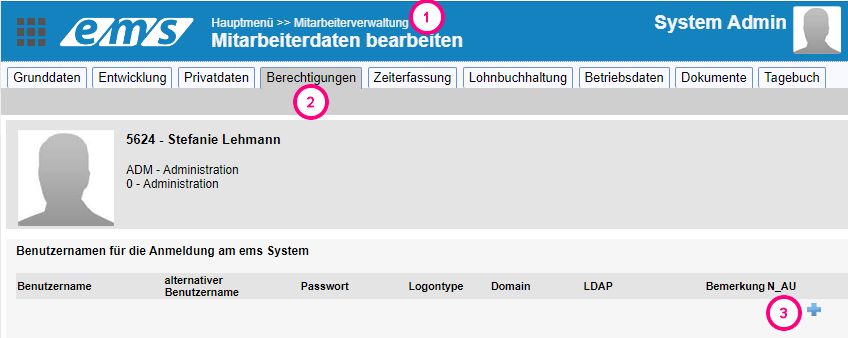
The screen that opens contains all possible logins that are accessible to the customer:
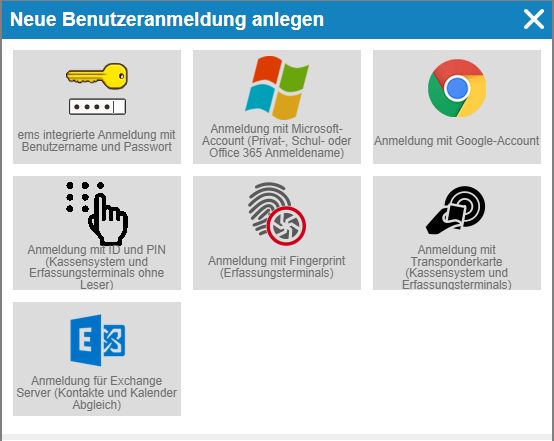
ems integrated login with user name and password (ems Web / ems Mobile) #
During the ems integrated login with user name and password, the login data for online access to the system (ems Web / ems Mobile) is created.
The user name is generated as firstname.surname. If an e-mail address exists in the employee profile, this is suggested as the user name. You can change the user name and password as you wish.
The option A password change is required will prompt the user to change the password when logging in for the first time.
The Send username and password information by email option generates an email that is sent to the user’s email address. If the e-mail address is not available in the profile, it must be entered here in the field.
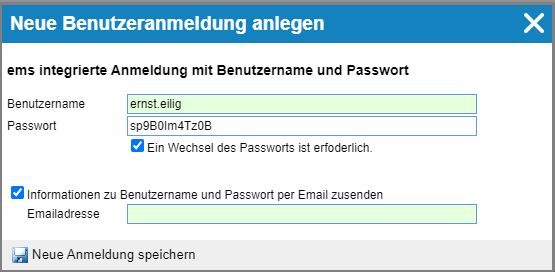
A user name created in this way has the logon type DATABASE.

If the password change has been activated, the password is visible until it is reset.

Sign in with Microsoft Account #
The login data from the Microsoft account (private, school or Office 365 login name) can be used as access data – the e-mail address of the Microsoft account must be entered.
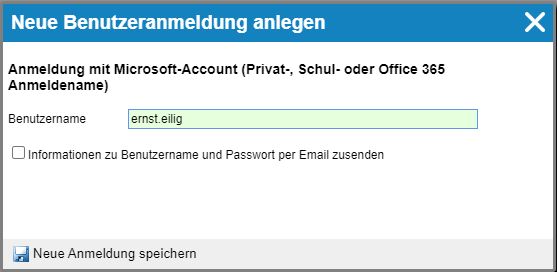
When authenticating via Microsoft, both company accounts (Azure AD), school accounts and Microsoft (formerly Live Account) can be used.
After successfully logging in from Microsoft, the user must give their consent once for the ems system to access their profile data. At the end, the user is automatically redirected back to the ems system.
(The use of Microsoft Login enables single sign-on with your company account).
The user name of this type has the logon type “MICROSOFT” in the list of user names.
Sign in with Google Account #
When signing in with a Google Account, the e-mail address of the Google Account must be entered.
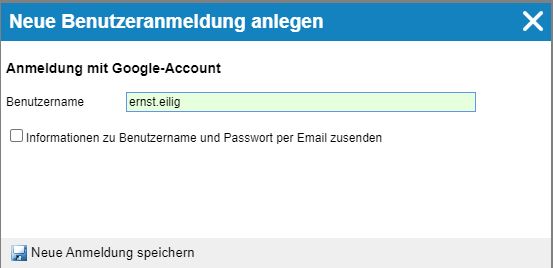
This enables authentication via Google. After successfully logging in to Google, the user is automatically redirected back to the ems system.
The user name of this type has the logon type “GOOGLE” in the list of user names.
Login with ID and PIN #
Login with ID and PIN is used in checkout systems and registration terminals without readers.
The password must correspond to the input keyboard: contain only numbers or numbers and letters.
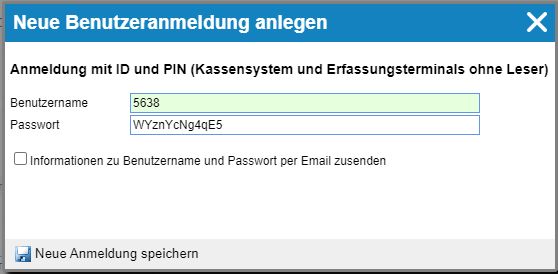
A user name created in this way has the logon type ID_PIN.

Login with fingerprint #
Fingerprint login is intended for registration terminals with fingerprint scanners.

A user name created in this way has the logon type FINGER (stored in the sensor) / FINGER_BIO (stored centrally).

Registration with transponder card #
The registration with transponder card is stored for the registration terminals and checkout systems.
Enter the transponder number in the User name field (usually located on the back of the badge. If not available, hold the badge up to the terminal and read the error message containing the transponder number).
A user name created in this way has the logon type LEGIC.

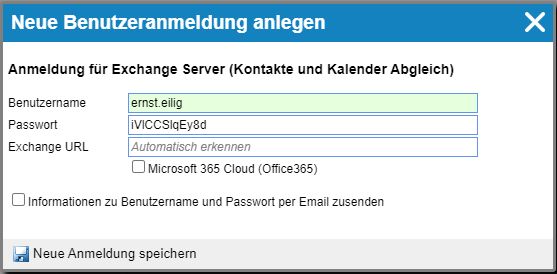
Registration for Exchange Server #
Contacts and calendar synchronization
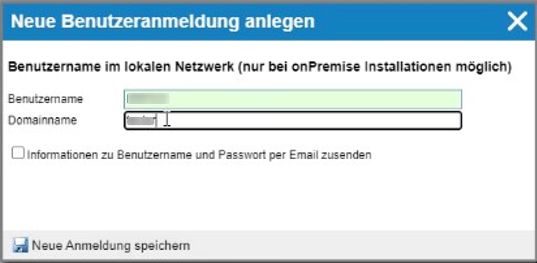
Network login #
User name in the local network (IIS authentication to local AD) – is only possible for OnPremise installations. Logontype – DOMAIN (Logon name AS IN NETWORK! Domain name – as stored)
ems Client #
Automatic stamping on the PC is carried out using ems Client, which must be installed on the employee’s PC.
Installation
You can find the “ems Installer” download here: https://www.ems-help.online/downloads/
Download the file and run this installer. Depending on your settings, you will be asked whether you want to run the application, select “Yes” or “Run anyway”.
When asked for the license key, copy your license key into the field (The license key can be found as follows: User menu → System settings → “ems ServerTool” / License key on the right).
In the selection of applications to be installed, simply select “ems Client” and carry out the installation.
How to install ems Client is described in detail here: https://www.ems-help.online/docs/erste-schritte-fuer-administratoren/installation-und-lizenzierung/ems-client/
Configuration
Once the ems client has been installed, start the normal web interface https://***.*m*-web.ch and log in with your account (Microsoft).
Open the user menu at the top right → My settings → “Data synchronization” tab. The “ems Client” button appears, which opens the settings dialog.
Check that “Attendance time” has been selected and that “Automatically stamp with user login” has been checked. By clicking Save, these settings are now transferred to the ems client. Depending on the browser settings, a message appears asking whether the link can be called up – confirm this with “Yes” or “Open ems client”.