Putting the terminal into operation #
Assembly and installation #
- Attaching the mounting plate to the wall
- Connect the power supply (power supply unit supplied or PoE)
- Establish an Internet connection (via WiFi, Ethernet or mobile radio)
If there is no Internet connection, the offline message appears.

Connection and configuration #
- After installation, a 4-digit code appears on the display.

- Log in to your personal ems system.
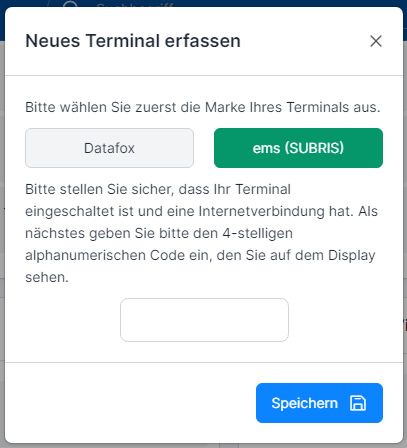
- Go to the system settings and click on the “Plus” symbol.

- After selecting the terminal type, you will be prompted to enter the code displayed.
Teach in transponder, fingerprint, face and PIN on the terminal #
Only the system administrator can gain access to enroll transponders, fingerprints, PINs and faces. To do this, click on the cogwheel symbol at the top right and log in as administrator.

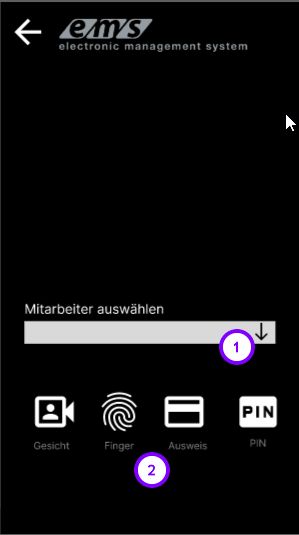
In the next screen, select the employee from the drop-down list (1) and click on the desired authentication type (2) → then teach in the authentication: recognize the face via the terminal camera, scan the fingerprint, scan the badge / transponder, enter the PIN.
If the data is saved successfully, a confirmation message appears and the lamp above the display lights up green.
If an error occurs, the error message appears and the lamp above the display lights up red.
Assign transponders via the ems system #
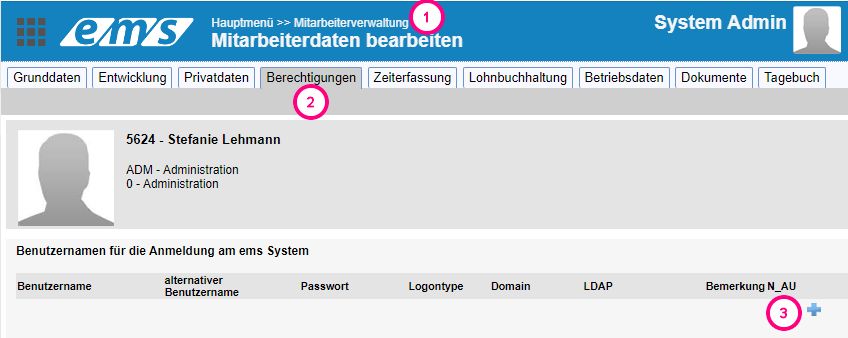
Alternatively, the transponder can also be assigned to the employee via the web interface. This requires the transponder number, which can be found on the back of the transponder. This number can be found under Employee administration → Employees → Authorizations tab → User name → Click on Plus → Login with transponder → Enter the transponder number under User name → Save new login
Store and manage authentications #
You can find out how authentications (fingerprints, face scans, transponders, PINs) are managed here: Storing authentications
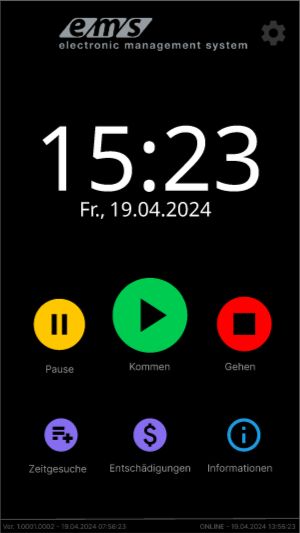
Operating the terminal #
The terminal interface is intuitively designed and is described in the following help article: ems time recording terminal TT5 and MT7
About the gear wheel you get access to teach in new authentication data (see above in the section Teach in transponder, fingerprint, face and PIN on the terminal).
Restart terminal #
If the terminal does not respond or does not recognize the media, restart the terminal. To do this, press and hold the on/off button on the right-hand side until the menu appears at the top. Select the Restart function.