
Record, Edit, and Delete Times #
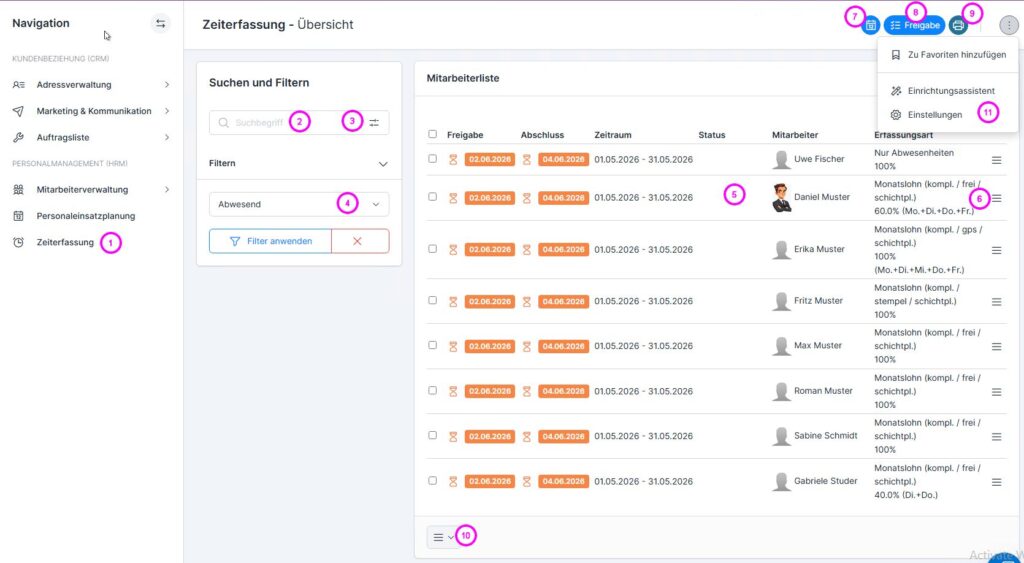
Open the “Time Tracking” menu section (1). Please note that, depending on your permissions in the system, only your personal profile will appear, and therefore no selection options will be available. For managers, a list of all employees assigned to them will be displayed.
You can search for (2 /3) and filter (4) employees. To open an individual employee’s time log, double-click their row (5) or click the three-bar icon on the right → Edit (6). The input form opens automatically.
The time tracking sheet also offers additional features:
- Open the Absence Calendar (7), Approval Form (8), Print Form (9), and Time Tracking Settings (11)
- Batch Functions (Print, Delete) (10)
1. Always use the Tab key or the available actions; do not use Enter. Otherwise, you’ll be kicked out of the open page.
2. Always SAVE before leaving a page; otherwise, the changes you made will be lost.
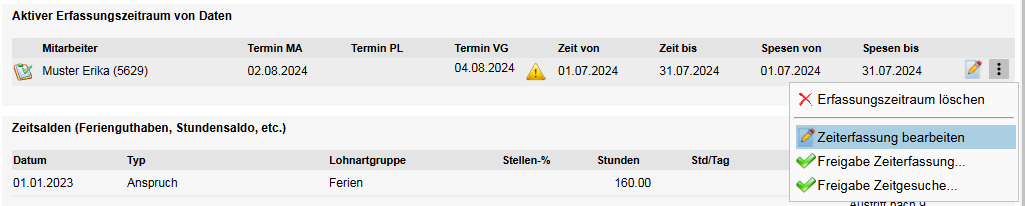
To quickly access an employee’s time tracking from their employee profile, click the three-dot icon → Edit Time Tracking under “Active Tracking Period ” in the Time Tracking tab.
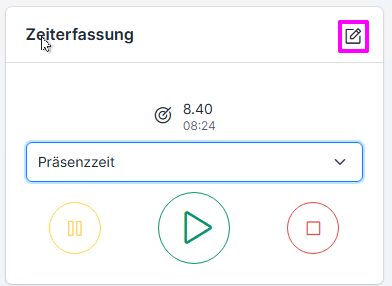
The quickest way to access your own time tracking is via the pencil button on the time tracking quick panel.
Daily View #
In the daily view, you must first select the date. Then enter the start and end times, the type of time, and, if applicable, the order number, as well as any notes (e.g., tasks completed during working hours, comments regarding absences). Finally, click Save (Plus).
In the new Design X 3.0, it is no longer possible to enter an incomplete time entry (start time only)—this can only be done using the time clock (quick panel) on the home page.
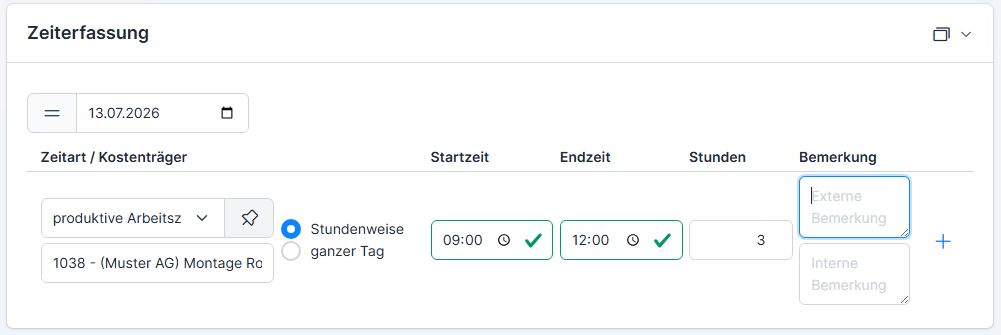
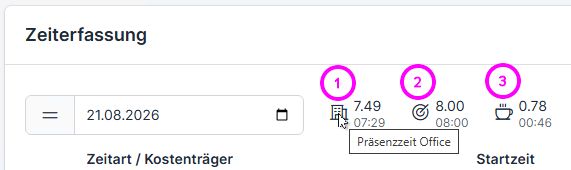
For each day, the totals for recorded work time (1), target time (scheduled hours according to the work schedule) (2), and break time (3) are displayed.
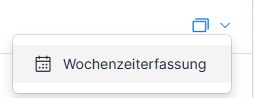
To switch to the weekly view, use the window button.
Be sure to clock out during your lunch break, as the ems system monitors compliance with rest breaks in accordance with labor law.
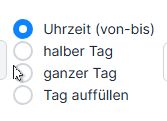
Depending on the time type, there are various options for time tracking:
- 1 – by the hour / Time (from / to)
- 2 – half day (1/2)
- 3 – full day (1)
- 4 – Refill the day (…)
- 5 – Maternity Leave (starting on [date]—98 fixed days)
You can use the icons on the right to do the following:
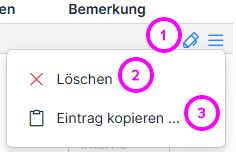
1 – Edit record / 2 – Delete record / 3 – Copy entry
Copy Record #
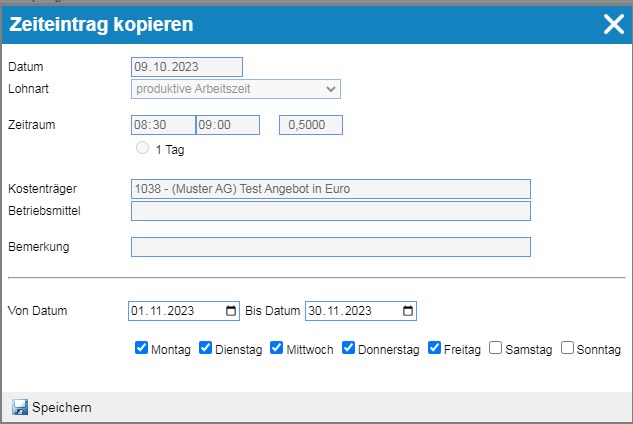
When copying a time entry, it can be copied for specific days of the week within a specified time period. This allows for quick time tracking when working hours are the same on certain days.
Simple Entry Type #
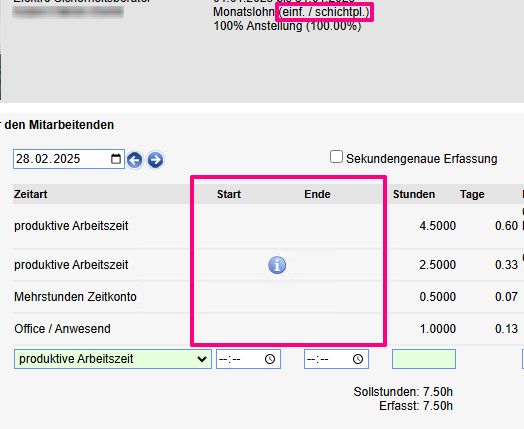
The “Simple” entry type is a simplified method of time tracking (only hours, without start and end times—e.g., 4 hours). It is used whenever a fixed daily work duration is specified. With this recording method, start and end times must not be specified; otherwise, an error will occur. Only the number of hours is specified.
Weekly View #
In the“Weekly View” tab, you can see the times you’ve entered, just like in the Outlook weekly calendar overview. You can also enter times here.
Click on the desired day, then select the duration and confirm, just as you would when creating an appointment in Outlook. For order-related time, select the cost object (customer order).
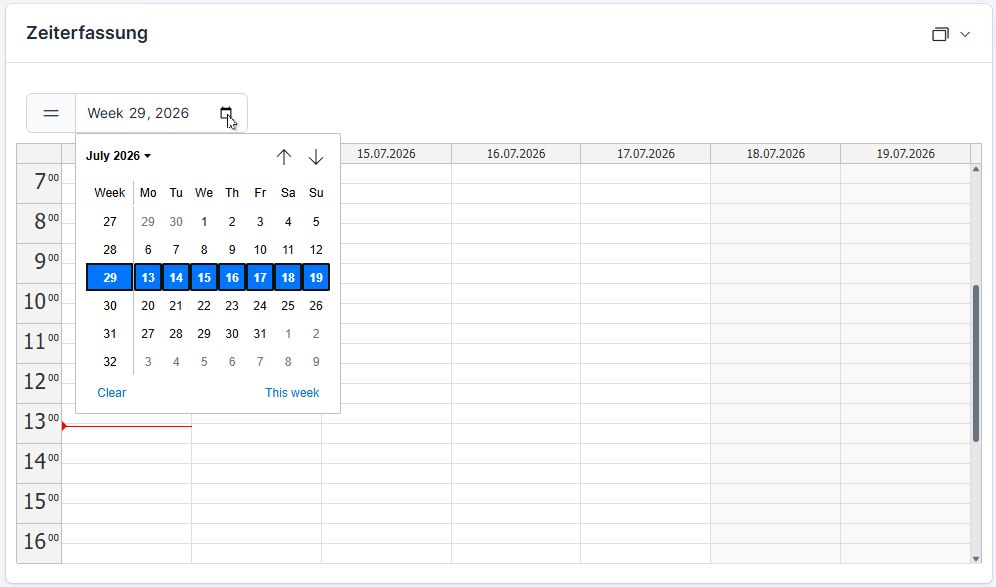
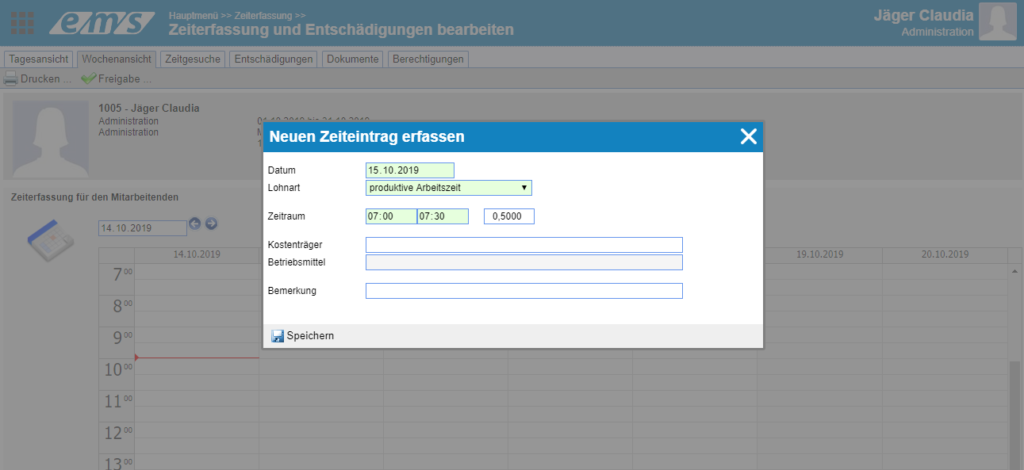
It is up to each user to decide which view (daily or weekly) to use when entering data. Each view has its advantages: the weekly view provides a better overview, while the daily view allows you to copy entries.
Shared Time Entries #
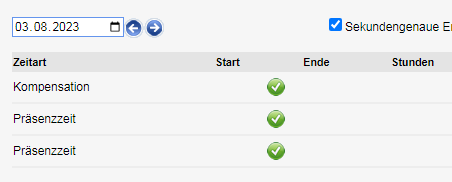
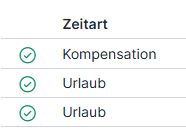
If the time period has already been approved, the time entries can no longer be viewed. In this case, they are marked with a green check mark.
In-House Time Tracking – Quick Panel #
The quickest way to access your own time tracking is through the time tracking quick panel.
Overview of Working Hours and Target Hours #
To get a better overview of the recorded time compared to the scheduled hours, you can display the monthly overview.
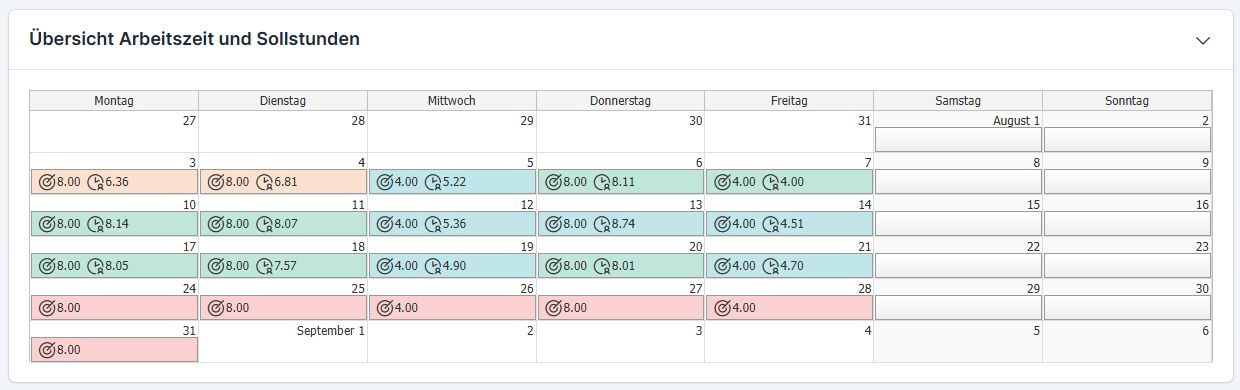
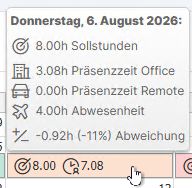
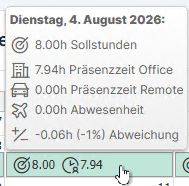
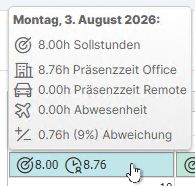
Depending on how the recorded time compares to the target time, the day can be highlighted in different colors: red (significantly below target) → orange → green → blue (above target). When you hover the cursor over the day, the daily data becomes visible: target hours (target time), time spent in the office or working remotely, absences, and variance.
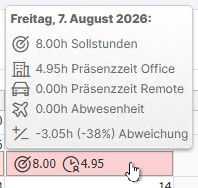
When you click on a tag in the overview, the tag opens in the time tracking section at the bottom.